
Written by [Asrun]
First Step:
Preparing your sketch and organising Layers
When it comes to Photoshop, and most other imaging programs, the order in which you place your layers is extremely important. In most cases, your line work will be ontop of your coloured work.
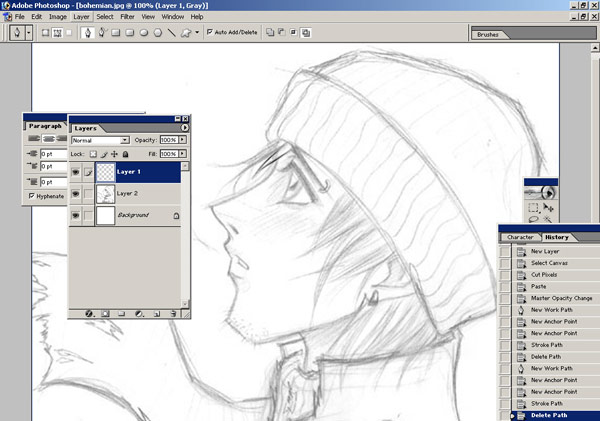
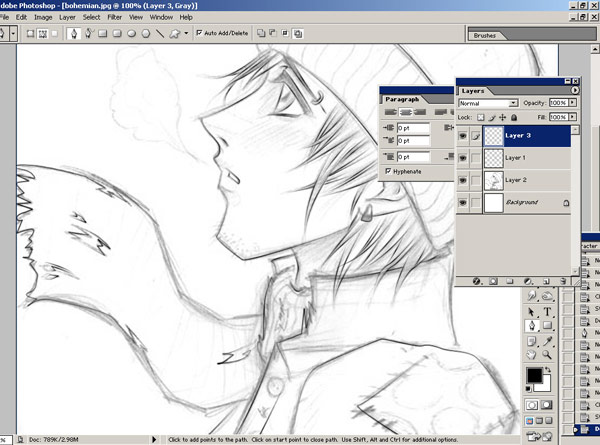
Here, you can see that I have a sketch drawn with pencil scanned in. I've kept it quite large in order to keep as much detail as possible. The larger the picture, the more detail you'll be able to encorporate.
Open your Layer Window. Window > Layer (show)
I've placed the sketch on a new layer. Layer > New in your options bar. Or just press the button on your layer window that looks like a new page (directly to the left of your trash can). To transfer your sketch from the background layer, press ALT + A on your keyboard to select the entire image. Then Press CTRL + X, make sure your on Layer 2 (the layer will be selected) and press CTRL + V. This will cut and paste your image on the desire layer. In this case Layer One or Two. I have mine set up to Layer 2. Change the Opacity of your sketch layer to 25-45%. You'll find this option at the TOP of your Layer Window. This will allow you to see your sketch lines, but also your ink lines
Now, press the New Layer Button. Make sure this layer is ABOVE your sketch layer. The names of your layers doesn't really matter as long as you put them in the right order. You can move your layers up and down by holding down your left mouse button and dragging them up and down. This will be where your inks will go.
You're now done step one! Only 1283109283 more to go. Don't give up! It's easy once you get the hang of it!
Second Step:
Preparing your Inking Tools
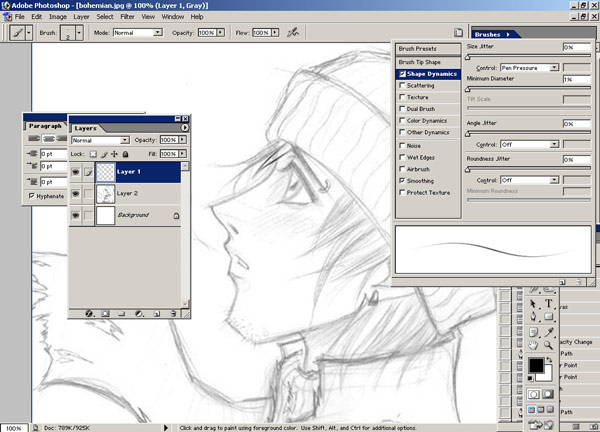
Select your PAINT BRUSH tool. The go to Window > Brushes (Show) this will bring up your brush options. Select Brush Tip. Change your brush to these settings. Diametre: Between 2-5 pixels, depending on the size of your image. Never use a 1 pixel brush. It looks pixelated. I usually use a 2 pixel. Angle 0, Roundness 100%. Hardness 100%, Spacing 25%. Your brush should look like what is on my screen. Under Shape Dynamics, make sure everything is at ZERO except for Minimum Diametre. Set that to 1%
Now your brush is ready for inking!
Third Step:
INKING!!
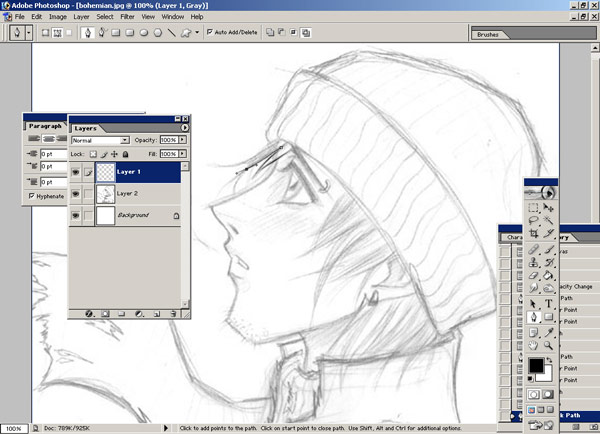
So, now you're ready to ink. Make sure you have selected your Ink Layer. The transparent layer above your sketch. Click your Pen Tool, Not any of those fancy pens. Make sure everything is selected on your toolbar (right under your file options) like I have here. Now, click at a point where you want to start inking. At the end of that line (or at a large curve) click and HOLD your mouse button down. Move your mouse from side to side. You should now be able to manipulate that curve to run along your lines. You can only do
ONE LINE AT A TIME. I know, it's time consuming, but in the end you'll have a beautiful ink job.
Onto the next step...
Fourth Step:
Applying the Inks
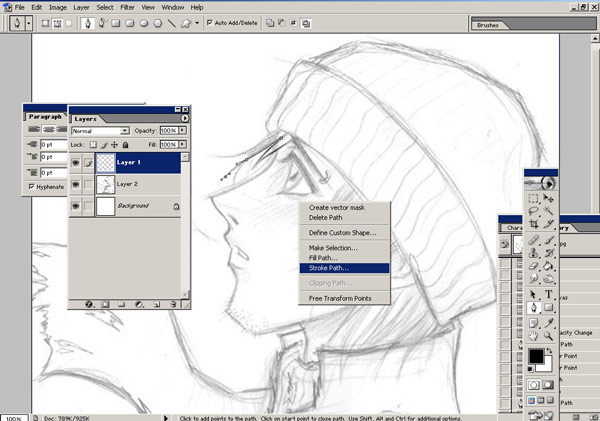
With the pen tool still selected, right click on your mouse and select "Stroke Path" as seen here.
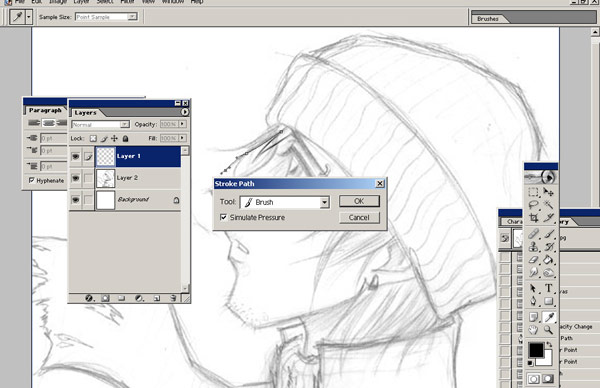
Now, select your paintbrush (you didn't select another type of paint brush, right? RIGHT?) And click "preserve Transparency". Press "Okay"! With some enthusiasm now! Com'on!!.... Okay.. right.
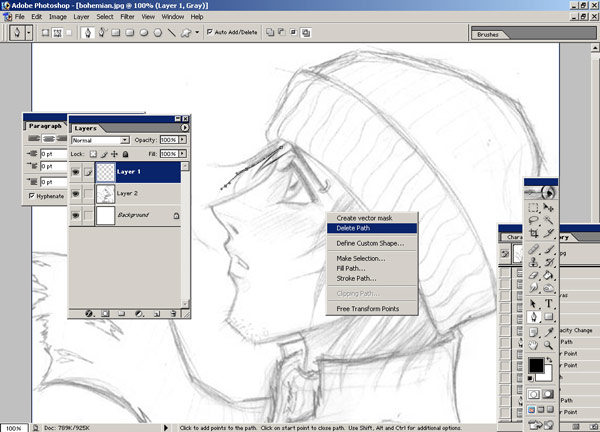
Now, right click again, and press "Delete Path".
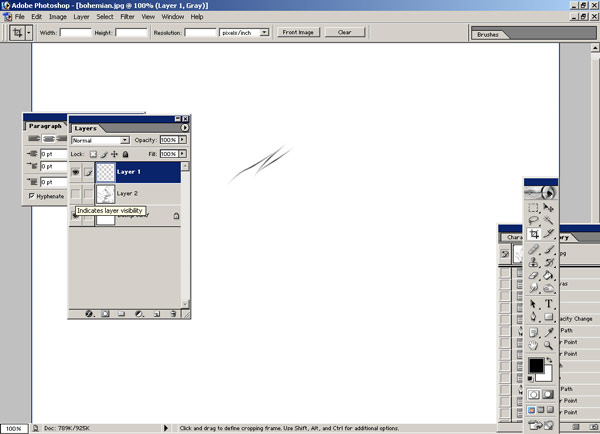
Now, click the little eyeball beside your sketch layer. This will make that layer invisible. Now you can see the ink work you've done so far! Woo! Pretty, isn't it? See how it fades out like that? That's the "Simulate Pressure" Without that, it'll be blocky, which it also a neat effect. To bring it back your sketch layer, click on the eyeball again.
Sixth Step:
Tricks of the trade
After inking your image on one layer, make a new layer above that and add some whispy hairs on the new layer. When done, go back to your original ink layer and erase any of the lines that cross those ones. You will now have some lovely movement in your hair and a neat layered effect. Dynamics people! Think of it!
Seventh Step:
Finished Ink
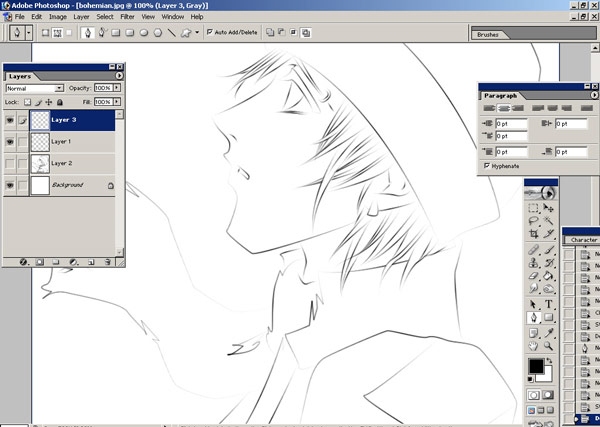
Now your inks are done. You should have something that looks like this! :D Place all of your colouring layers underneath your inks, and have fun. You can also change the colours of your inked lines be pressing Preserve Transparency on the ink layer (s) and colouring over them.

Congratulation
s. You should now have a beautifully inked image. For any questions, or clarification, please leave a message in the comments box, or contact me.
I hope you found this helpful! :D
 Stumble!